Showing posts with label brief. Show all posts

Friday, 13 February 2009

OUGD102 Self Evaluation

What practical skills have you developed through this module and how effectively do you think you have applied them?

I think my skills with Illustrator and Indesign have moved on much more, the work has almost forced me to use the software and experiment and develop ideas with the tools such as the pen tool, and adjusting the weights of stroke and fill. It was a breath of fresh air to actually be shown Indesign properly and be able to create a book with ease, ordering pages as appose to attempting to teach yourself in your ND course for an FMP, mentioning no useless tutors names (Chris Coldbeck) 

What approaches to/methods of problem solving have you developed and how have they informed your design development process?

The blog on this particular module has been really useful, a great place to get feedback from work, put down your ideas and show a clear path of where you need to take your ideas and processes. The what if? brief was my favourite of this module and problem solving in a group was not only useful but really enjoyable to do, to be able to devise a solution from a problem has been useful.

What strengths can you identify in your work and how have/will you capitalise on these?

The strengths have been through the use of a computer from the research, development through software and documenting on my blog from crits and progress. It doesn't feel like a chore anymore to update the blog, I'm now quite happy to ramble on individual posts about my work.

What weaknesses can you identify in your work and how will you address these more fully?

Time management has again been an issue, working on weekly briefs was intense in the first module, but I eventually got used to it and I worked alright, but with the book brief spanning 5 weeks, I had a tendency (and I think a few people did) to relax for the beginning of the brief a little then have to work much harder towards the end of the brief. If I had worked at the same pace throughout, I would of definitely produced more work. 

Identify five things that you will do differently next time and what do you expect to gain from doing these?

1. More primary research
2. Be consistant with work amounts
3. Timetable days more, have a fixed list of things to do that day, organised from the start!
4. Use the studio more, i did in the first module, but slipped a little with going home earlier.. I do work better at Uni.
5. Don't be so focused with ideas in development, I keep doing it!

Are there any things we could have done differently that would have benefitted your progress?

The same as the list of 5 really, and get organised. Use time for effectively.

How would you grade yourself on the following areas:
(5=excellent, 1=poor)

Attendance: 4
Punctuality: 4
Motivation: 3
Commitment: 3
Quantity of work produced: 3 (I'm not happy)
Quality of work produced: 3
Contribution to the group: 4

Ps + Ai + Id = A6

The book from the Ps brief we had to show the design process, If Im honest I didn't really know what to do for this, what to include so I basically showed the design process for a previous brief. Working from the initial 100 photographs collected onto the what if? brief finals.. showing the process and design decisions on how it lead to a smile campaign. Even though it is stupidly simple, I do really like it. I haven't really got used to simple in my work, I always think it needs more. For this Im relying on the images to explain the process. I think it does.


Wednesday, 11 February 2009

The book.

Ive lost count of how many practice prints Ive done, so I went ahead with the settings on my printer all sorted, the stock sat perfectly in the printer and what I thought was everything sorted, printed fine, until I came to trim..


Vertical alignment was perfect throughout but the horizontal wasn't in a few places, I think this is the worst example in the entire book, where you can see around 4mm of the wrong page in the gutter. Not a happy bunny. To be off by a weird amount, I dont think it was down to the documents themselves, they were laid out properly, I think it may of been down to the paper feed on the printer. As this wasnt a duplex printer, it doesn't know the the paper will need to be reloaded into the printer. I think it was just pot luck and unfortunately it hasn't worked a couple of times.

Some pages came out perfect which I'm really happy about, it looks quite tidy.

Some pages Ive got away with just but still not to the standard I wanted.

The additional folds look quite good, and alignment hasn't been too much of an issue with these (the pages were 85 mm wide instead of the book pages which were 95 mm) 

The book bound with staples, (which wasn't a problem), I thought staples would look untidy but it doesn't I quite like it. For the final hand-in i will have this book, layouts of each page spread, and a net layout of the outer packaging. With problems with printing on a large scale only until recent. I think i will print the net at full size eventually, for personal reasons.

Tuesday, 10 February 2009

Carton Development.

Some of the images aren't in the exact order, but you can tell the flow where things have been refined. Feedback from my mini crit will be posted shortly.


Monday, 2 February 2009

Writing with light and lines.

A little experiementation with writing with light, playing with just the technique then moving and progressing onto something else.. development.. particular words in different places?
The light on my phone has found a use..
Flash gun additions add another level to the images.
Patterns particularly hard to control on this level and size, but still quite nice, some depth from how close the light is to the camera.
Experiment with my name one letter at a time, im happy with the result, especially the ! :)

The same but with some crop-age goin' on. could be a typeface? try different colours?


*update*

I knew i found a designer somewhere which used light techniques for advertising campaigns, here shown for ducati is a similar effect used and I really like it. More on his website here

Thursday, 29 January 2009

Couple o' designs


I want to keep the interior quite typographical, a couple of ideas to draw attention to the main and key points and facts Ive found out, with related facts selected and placed next to these main pieces. Just a piece of development really.

STATEMENT update.

Hello! quick update from the crit I had earlier today which I think went really well. Got some good feedback about the direction I should take the book, and how it should look. After progressing from just bottle visuals, the main focus of the book will be of 'whats inside' the drinks, revealing the truths about what is inside the average softdrink. The main 100 will now be of facts and statistics for drinks and their effects on health. Originally I wanted to just show the effects of drinks on how bad they are, one sided.. but now to keep the arguement balanced and not put people off completely, Im going to include facts and figures about water and healthier alternatives, which should work pretty well. Browsin' on t'web I found some splash images of water here which I thought about including towards my work. When you see drinks in frosted glasses and loads of ice splashing into the glass, it makes it look really nice and makes you want to drink it.. I thought something like this for on the cover to tempt you in but then show you the facts so you think twice.. nice little twist? Might not make sense now, but it will when I do it. Originally I wanted a gif on here to show the drink pouring, that didnt work so ol' fashion photos will have to do. 

Now I know why I bought a light box and two lamps to university with me.. 


My favourite. The size does justify them.. 
^ Click dat fool. ^

Mmm diet coke. Shame it has Aspartame which can cause cancer.

Wednesday, 28 January 2009

Get your book on.

The book from the workshop we had on book binding with intense roger back before christmas, pretty happy with how it came out, but I don't think this would be the best way to bound my book in the final piece.


'100' book development

Sat in one of the 'what is a book' seminars, I had a brainwave for some sort of packaging cover/book opening.. Originally my idea was just to have a screw cap to unlock and open the book in a usual standard, but I made my way onto the carton you see below. This is the second sketch model I made and its turned out quite good. I thought I'd photograph it and pop it on the blog.
the exterior to look as much like a drinks carton as possible, just like the 'shelf life' book featured previously. An extra flap added for the carton to open out properly (needs to be refined)
Unscrewed, you can see the openings clearer. The top of the main flap tucks nicely in the seal of the carton, which i didnt mean to happen.. but works really well.
The main side will fold out, leaving the rest of the carton to stand still, maybe some additional graphics/pattern inside? although I do like the foil interior.
The flap in tucks completely and the extra sides fold out to reveal one large side, where I plan to add the book, fold in the centre. A ring bound book I think would work best here, but I shall experiment and see. On the vertical part of the carton, I added tape as a simple way of keeping the flaps tucked in, but obviously in the final book, the net will be made to accommodate the side flaps.

Sunday, 14 December 2008

Smile!

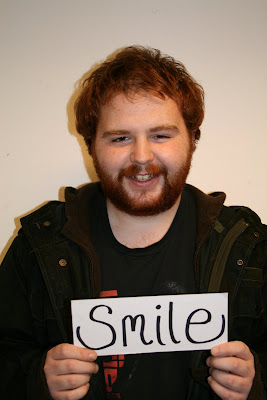
 So yet again another blog update to do when ive left the blog alone for too long.. Well pretty chilled few weeks for the work in some cases, but the recent brief turned out quite good. 'What if?' was the title and we had to devise a problem from the previous research in the brief (research from a theme devised from 100 photographs taken) in a nut shell. Our problem in my group (Martyn Woolley, Sophie Robinson, Rebecca Liggins and myself) was that leeds isnt happy enough from all the research we did.
From this, and the questionnaires formed we tried to solve the problem directly from the answers 'what makes you smile?' answers included smiling from other people, comedy and other related answers. the solution was really only based around photographs I took with art direction.. they came out quite good. Check emmm-


look alright don't they? Going for more of a natural smile than something that may look forced.. and I think we did it well.